
Are you searching for a versatile garment that adds a touch of elegance to any outfit? Acrochetribbed button shrug is a fantastic choice. This stylish piece features a unique texture created by its distinct ribbed design. Furthermore, it includes functional buttons for added charm and adjustability.
This article provides a comprehensive guide to creating your very own crochet ribbed button shrug. We will walk you through each step, from selecting the right yarn to mastering essential stitches. You will learn how to read a crochet pattern and ensure your finished shrug fits perfectly.
Crafting a shrug can be a rewarding experience. You will choose your preferred yarn and hook size. We will detail every row, making the process straightforward for you. Consequently, you will gain confidence in your crochet skills. This pattern is suitable for various skill levels.
Imagine wearing a cozy, handmade shrug that complements your personal style. We will cover all the necessary techniques to achieve that beautiful ribbed texture. You will also discover how to seamlessly incorporate the button closures. Get ready to embark on a creative journey with your crochet hook!
Why a Crochet Ribbed Button Shrug is Your Next Must-Make Project
A crochet ribbed button shrug is your next must-make project because it combines style, comfort, and practicality in onewearableitem. This versatile piece can elevate any outfit, from a simple top to a formal dress. It offers warmth without the bulk of a full sweater. Furthermore, this project is surprisingly easy to tackle, even for a beginner. Our detailed instructions and accompanying video tutorial make the process straightforward. You will learn essential crochet techniques while creating a stunning fashion accessory. The shrug’s ribbed texture adds visual interest and a cozy feel. You will appreciate the adaptable nature of this garment. It features comfortable sleeves and a button closure for a custom fit. We provide a clear gauge to ensure your finished piece is perfect. This free pattern allows you to create a stylish item without extra cost. Consequently, it’s a rewarding project for any crafter.
Understanding the Ribbed Stitch: Key to Your Shrug’s Texture
The ribbed stitch is crucial to your shrug’s texture because it creates a distinctive, elastic fabric. This technique mimics the look of knitting, producing vertical lines that add depth and flexibility. Understanding this stitch is vital for achieving the desired appearance and drape of yourcrocheted garment. You will primarily use front post and back post double crochet stitches to form the ribbing. These stitches work around the posts of the previous row, rather than into the top loops. This method pushes some stitches forward and others backward, creating the raised and recessed lines. Consequently, this gives the fabric its signature texture. Mastering this technique will enhance your crochet skills. It opens up possibilities for many other patterns, such asbeaniesand scarves. The elasticity provided by the ribbed stitch ensures a snug yet comfortable fit for your button-adorned shoulder wrap.
Choosing the Perfect Yarn for Your Crochet Ribbed Button Shrug
Choosing the perfect yarn for your ribbed button shrug involves considering fiber content, weight, and color. The right selection ensures both comfort and durability for your finished piece. Your choice significantly impacts the drape and feel of the garment. For a cozy and warm shoulder wrap, wool or acrylic blends are excellent options. These materials offer warmth and good stitch definition, highlighting the ribbed texture. Alternatively, cotton yarn provides a lighter, breathable item, perfect for warmer climates. Consider the season you plan to wear your button-adorned shoulder wrap. Yarn weight also plays a crucial role. A medium-weight (worsted) yarn is often ideal, as it works up quickly and creates a substantial fabric. Lighter weights, like DK or sport, result in a more delicate piece. Darker colors can create a sophisticated look, while brighter hues add a playful touch.
Hook Sizes and Gauge: Getting Started Right
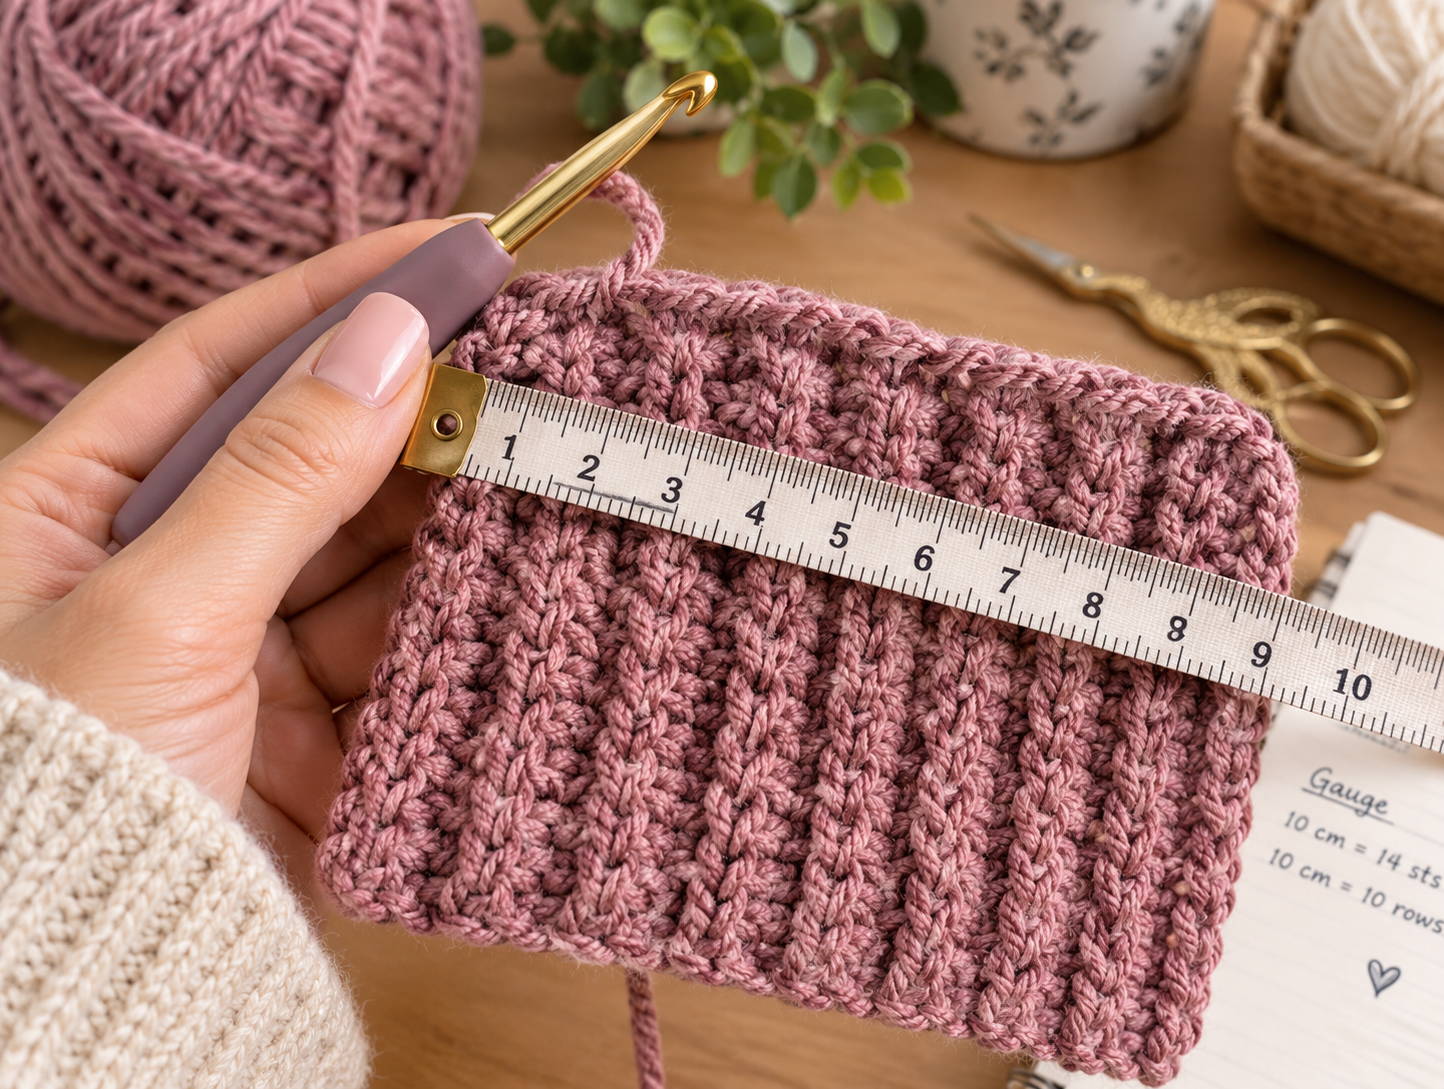
Getting started right with your button-adorned shoulder wrap depends on selecting the correct hook size and achieving the proper gauge. These steps are essential for ensuring your finished piece matches the pattern’s dimensions. Incorrect sizing can lead to a piece that is too large or too small. The pattern specifies a particular hook size, but this is merely a suggestion. Your individual tension can vary significantly. Therefore, creating a swatch is a critical step. This small sample allows you to check your stitch and row count against the pattern’s gauge. To check your gauge, follow these simple steps: 1. Work a swatch that is at least 4×4 inches using the recommended hook and yarn. 2. Measure a 4×4 inch section within your swatch. 3. Count the number of stitches and rows within that measured area. If you have too many stitches or rows, switch to a larger hook. If you have too few, use a smaller one. Adjust your hook until your swatch matches the pattern’s gauge. This attention to detail guarantees a successful outcome for your new accessory.
Step-by-Step Guide: Crocheting Your Ribbed Button Shrug
Crafting your own cozy shoulder wrap involves a series of clear steps, ensuring a beautiful and functional finished piece. This guide will walk you through each stage, from starting your foundation chain to adding the final embellishments. Following these instructions carefully will help you create a lovely handcrafted item.
Step 1: Create the Foundation Chain.Begin by making a slip knot and chaining the required number of stitches. This forms the starting edge of your item. Ensure your chain is not too tight, as this can make the first row difficult to work into.
Step 2: Work the Body of the Wrap.Work in rows, typically using a back loop only (BLO) technique to achieve the textured effect. This creates the characteristic lines of the fabric. Continue until the fabric reaches the desired length for your shoulder covering.
Step 3: Shape the Armholes.Depending on your chosen design, you will either leave gaps in the fabric or fold and seam sections to create armholes. Refer to your specific pattern for detailed shaping instructions.
Step 4: Add the Edging.Once the main body is complete, add a neat border around the entire piece. This often involves single or half double stitches, providing a clean finish. This step also prepares the edges for the closures.
Step 5: Attach the Closures.Sew the decorative fasteners onto one edge of the opening. Space them evenly for a balanced look. Create corresponding loops or buttonholes on the opposite edge, ensuring they align perfectly with the closures.
Step 6: Weave in Ends and Block.Finally, weave in all loose yarn tails for a polished appearance. Gently wash and block your finished piece. This process helps to even out stitches and set the shape of your new accessory.
Foundation Chain and Ribbing Panels
Creating the initial chain is where your cozy shoulder wrap truly begins. You will first make a slip knot and then chain the specified number of loops for your desired size. This initial chain forms the length of your shrug, so measure carefully. Remember to keep your tension consistent, but not overly tight, to ensure easy workability in the subsequent steps. Next, you will begin working the fabric panels. These panels create the beautiful texture of your accessory. You will typically work back and forth in rows, utilizing a technique that emphasizes the characteristic lines of the fabric. This method is crucial for achieving the desired look and feel. Continue working until each panel reaches the specified dimensions for your particular design. For visual guidance on this technique, you might find thisvideo tutorial on creating textured fabrichelpful.
Assembling the Shrug and Adding Sleeves
Assembling your cozy shoulder wrap and attaching the arm coverings brings your creation to life. First, lay your main fabric panel flat. Carefully fold the piece to determine where the armholes will be. You will typically seam the edges, leaving openings for your arms. Next, you will join the pieces. Use a yarn needle and matching fiber to sew the seams with a whipstitch or mattress stitch. This creates a strong, invisible connection. For a seamless look, ensure your joining technique is neat and consistent. Once the body is connected, you can begin adding the arm coverings. These are usually worked in the round or as flat panels that are then seamed. Integrate the arm coverings by sewing them securely to the armhole openings. Yourcrocheted sweater keychainmight have given you practice with small-scale assembly.
Adding the Buttons and Finishing Touches
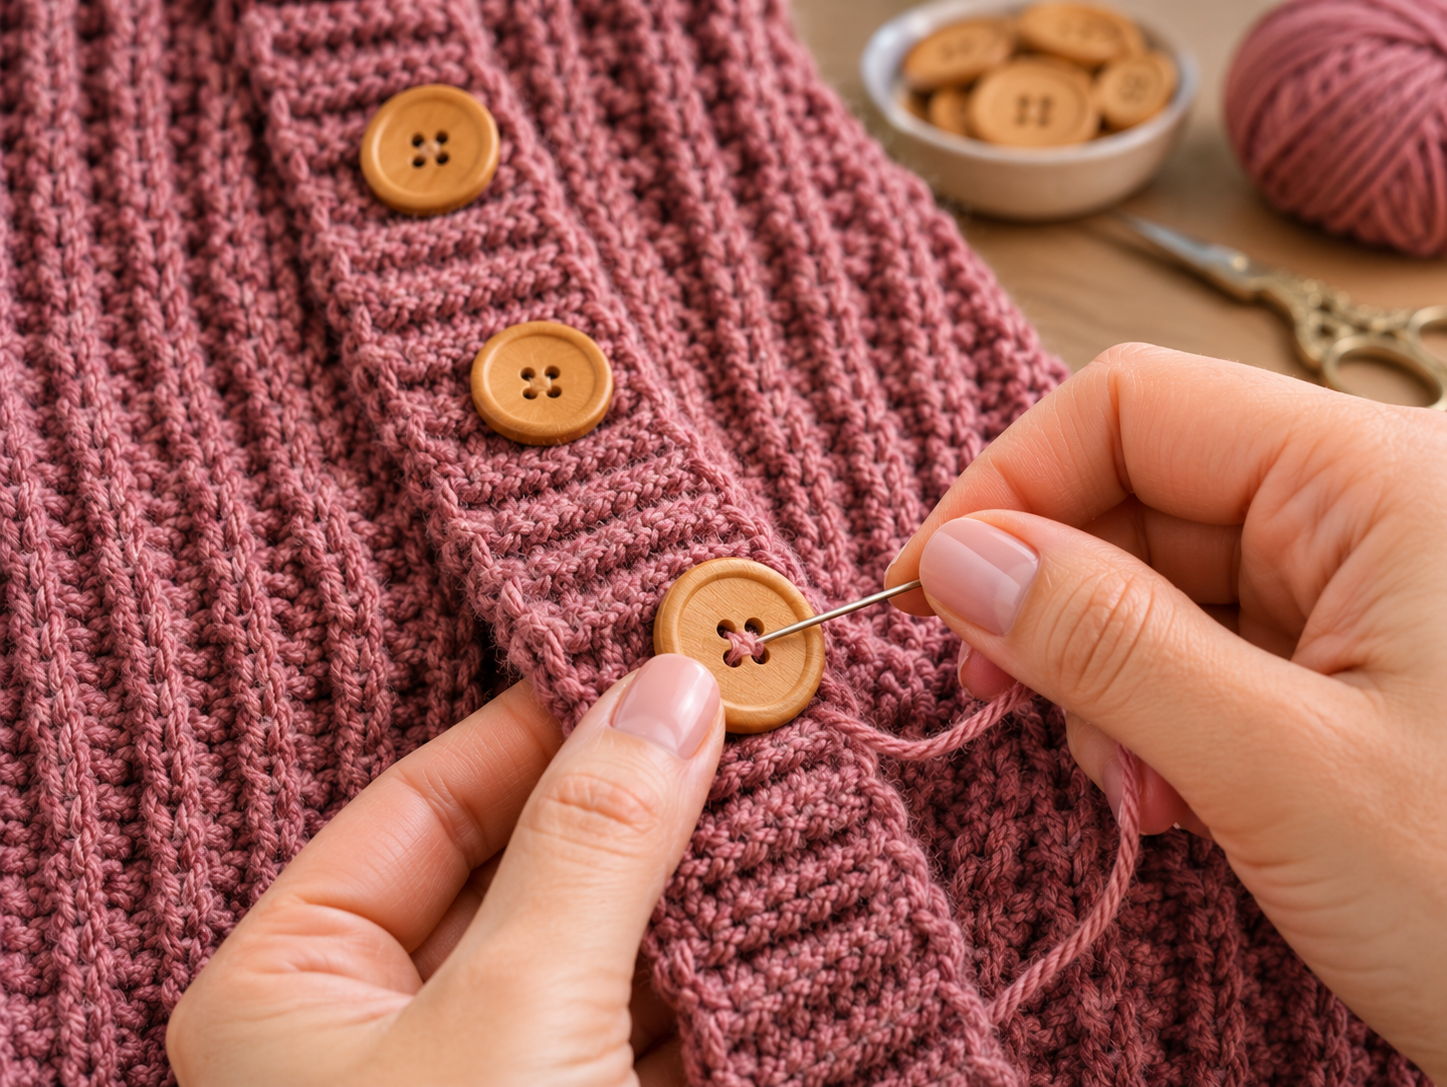
How do you add the fasteners and complete your cozy shoulder wrap? Attaching the decorative closures and applying final details gives your handmade item a polished look. Begin by selecting fasteners that complement your design. Lay the piece flat to determine precise placement. Carefully sew each closure onto one front edge of the opening. Space them evenly for a balanced appearance. Then, create corresponding loops or holes on the opposite front edge. Make sure these align perfectly with the closures. This ensures a secure and attractive closure. Finally, weave in any remaining loose fiber ends. A good blocking technique will help set the shape and even out the texture. For inspiration on finishing techniques, explore ideas onPinterest.
Customizing Your Shrug: Sizing and Style Variations
You can easily tailor your cozy shoulder wrap to fit any body type and personal aesthetic. Consider adjusting dimensions for a perfect fit or experimenting with different design elements. This allows for truly unique creations. For sizing adjustments, measure your back width and arm length. You can increase or decrease the initial chain to alter the overall length of the accessory. Adjust the number of fabric panels to change the width across your shoulders. Furthermore, modify the length of the arm coverings for a snug or relaxed fit. Style variations offer endless possibilities. Try an open-front design without closures for a relaxed look. Alternatively, add a hood for extra warmth and a different silhouette, perhaps inspired by acrochet hooded capelet. Experiment with different fiber types for varied textures and drape. A thicker fiber creates a cozier feel, while a thinner one offers a lighter accessory.
Tips for Beginners: Mastering Your First Crochet Ribbed Button Shrug
New to crafting this cozy shoulder wrap? Starting your initialtextured outerwearcan be straightforward with a few key pointers. Focus on consistent tension from the beginning. This helps create even, attractive fabric. Inconsistent tension leads to an uneven appearance. Choose a simple fiber and hook size. A medium-weight acrylic is often recommended for beginners. It is forgiving and easy to manipulate. Opt for a hook size that complements your chosen fiber. Always make a swatch first. This small sample helps you check your tension and fabric density. It ensures your finished piece will be the correct size. Pay close attention to the instructions for forming the fabric panels. They are crucial for the overall structure. Don’t be afraid to unravel and restart sections. This practice improves your technique over time.
Caring for Your Handmade Crochet Shrug
Caring for your handmade shoulder wrap involves simple steps to maintain its beauty and longevity. Proper care ensures your cozy accessory remains in excellent condition. This helps it last for many years. Always check the fiber label for specific washing recommendations. Most handcrafted items made with acrylic or cotton blends are machine washable on a gentle cycle. Use cold water to prevent shrinking or stretching. Place the item in a mesh laundry bag. This protects it from snags. Avoid harsh detergents or bleach. Instead, opt for a mild cleanser. After washing, gently squeeze out excess water. Do not wring the fabric. Lay the piece flat on a clean, dry towel to air dry. Reshape it carefully as it dries. This method prevents distortion. Avoid hanging it, as this can cause stretching.
FAQ About Crochet Ribbed Button Shrugs
How do you make a sweet ensemble with a fastener?
You begin by creating a foundation chain that matches your desired width. Next, you work back and forth in a specific technique, often using back loop only single or half double techniques, to achieve the textured effect. Once the main body is complete, you will add edgings and then attach the fasteners. This creates a versatile, cozy accessory.
What thread is ideal for a textured fastener wrap?
Medium-weight acrylic or wool blends are excellent choices for this type of wrap. They offer good drape, warmth, and are easy to work with. Consider fibers that provide a nice bounce to enhance the textured appearance. A soft fiber ensures comfort against your skin.
Is a textured fastener wrap suitable for newcomers?
Yes, this item is very beginner-friendly. The main technique involves repetitive motions, which helps build confidence and consistency. Simple shaping and minimal finishing make it an accessible introduction to wearable crafting. Many find it less intimidating than larger articles.
How much time is needed to craft a textured fastener wrap?
The completion time varies based on your individual speed and the dimensions of your creation. Generally, a small to medium accessory can be finished in a weekend or a few evenings of dedicated crafting. Larger versions might take a bit longer. You can see a visual example onPinterest.
What methods are frequently employed for the raised effect?
The raised appearance is most often achieved using the back loop only (BLO) method for single or half double techniques. Alternatively, front post and back post double techniques can create a more pronounced texture. These methods push the material forward, creating the distinctive lines. For other accessories, explore making aCrochet Sweater Keychain.


