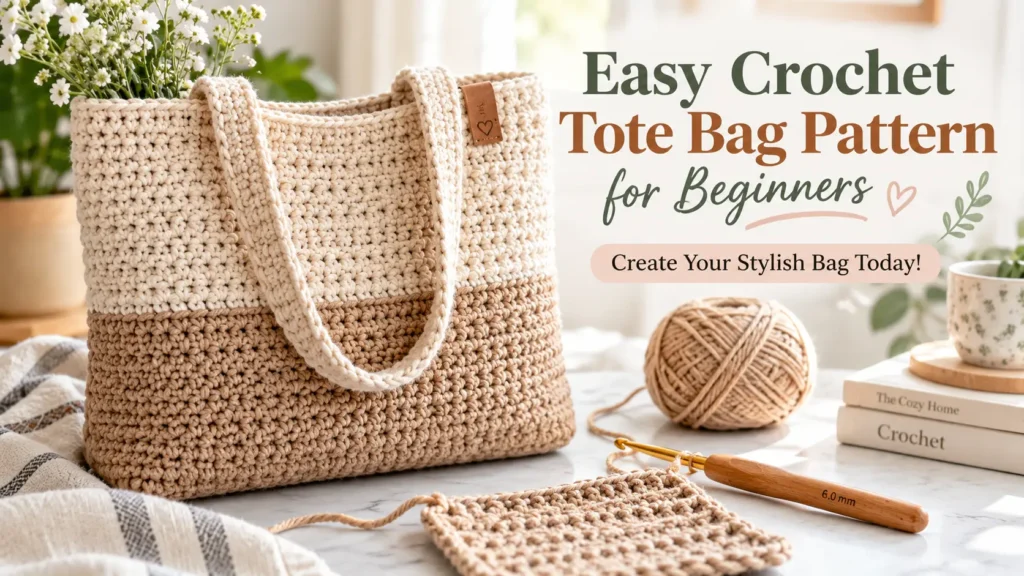
Are you searching for a fun and practical project? Learning to make a crochet tote bag is a rewarding experience. This guide provides an easy crochet tote bag pattern for beginners. It’s perfect for those new to the craft.
You will learn essential stitches like the single crochet and half double crochet. These techniques form the foundation of many projects. This free pattern offers clear pattern instructions. You can create a beautiful and functional crochet bag. Furthermore, it’s a beginner friendly design. You will be proud to carry your finished tote.
Our comprehensive guide also includes tips for choosing the right yarn. We offer advice on understanding yourpdf pattern. This ensures a smooth crafting journey. Get ready to dive into the world of easy crochet. Soon, you will have your very own handmade accessory. Let’s start crafting!
Why a Crochet Tote Bag is the Perfect Beginner Project
A crochet tote bag is an ideal beginner project because it teaches fundamental techniques while giving you a practical finished item.
You will quickly learn essential skills like theslip stitchand the starting chain. These basic stitches are useful for many future crochet projects.
This project also helps you practice consistent tension and stitch counting. As you work, you will become more confident using your crochet hook.
A tote bag is also a forgiving project for beginners. Small imperfections often blend naturally into the overall design, so you can focus on improving your technique without worrying too much about mistakes.
You can create strong, durable straps that make the bag practical for everyday use. This makes it suitable as a market bag, shopping bag, or casual everyday tote.
The size is easy to customize as well. You can adjust the width, height, or strap length to create a bag that fits your needs and personal style.
Best of all, the materials are simple and widely available, making this an accessible project for anyone starting to crochet.
Gather Your Supplies: Materials Needed for Your Easy Tote
To begin your crocheting journey, you will need a few essential items. These will help you create your easy crochet tote bag. Having everything ready ensures a smooth and enjoyable crafting experience. Here is a list of the items you will require:
| Item | Description |
|---|---|
| Yarn | Choose a medium-weight (worsted) cotton or acrylic yarn. Cotton is excellent for structure, while acrylic offers a wide color range. Approximately 400-500 yards are needed. |
| Crochet Hook | A 5.0 mm (H-8) crochet hook is generally suitable. This size works well with worsted weight yarn. |
| Scissors | You will need these for cutting yarn tails. |
| Yarn Needle | This tool helps weave in loose ends. It also assists in joining pieces, like agranny square. |
| Stitch Markers | These small clips help keep track of your rounds. They are especially useful for beginners. |
| Measuring Tape | Use this to check your bag’s size. It ensures your tote meets your desired specifications. |
These items are easily found at craft stores or online. They are fundamental for creating various crocheted accessories.
Understanding the Basics: Gauge, Dimensions, and Abbreviations
Understanding the Basics: Gauge, Dimensions, and Abbreviations
Understanding gauge, dimensions, and abbreviations is crucial for a successful crochet project.
Gaugerefers to the density of your crocheted fabric. It tells you how many stitches and rows fit into a specific measurement. Achieving the correct gauge helps ensure your finished sweet rolls match the intended size.
You can check your gauge by making a small sample square, often called aswatch. Compare its measurements with those provided in the pattern.
If your swatch is too small, try using a larger crochet hook. If it is too large, switch to a smaller hook.
Dimensionsare the finished measurements of your project. They usually include the height, width, and depth of the completed item. Paying attention to these measurements helps ensure your crochet sweet rolls come out at the correct size.
Abbreviationsare shortened versions of common crochet terms. Learning them makes crochet patterns much easier and faster to read.

Step-by-Step: Easy Crochet Tote Bag Pattern Instructions
Step-by-Step: Easy Crochet Tote Bag Pattern Instructions
How do you create aneasy crochet tote bag? Follow these simple steps to craft your very own carry-all. This guide will walk you through each stage. You will create a lovely and functional item.
Step 1: Create the BaseBegin by making a slip knot. Then chain 26 foundations. This forms the bottom of your bag. Work single crochet into the second chain from the tool. Continue across the row.
Step 2: Build the SidesAfter completing the base, work in continuous rounds. Use the single crochet technique for several rows. This will form the body of your bag. Place a marker at the beginning of each round.
Step 3: Shape the BagContinue working in single crochet rounds. Maintain consistent tension. This helps create an even fabric. Work until your piece reaches the desired height.
Step 4: Form the HandlesDecide on your preferred handle length. Chain a series of links for each handle. Skip an equal number of elements on the main body. Attach the chain to form a loop.
Step 5: Finish the HandlesWork single crochet around each handle chain. This strengthens them. Join them securely to the bag body. This creates durable carrying loops.
Step 6: Weave in EndsCut any remaining strands. Use a tapestry implement to weave them into the fabric. This creates a neat and professional finish. Your new carry-all is now complete!
Crocheting the Base of Your Tote Bag
How do you begin crocheting the base of your carry-all? You start by establishing the foundation for yourcrochet project. First, make a slip knot. This secures the beginning loop on your tool. Next, create 26 foundation links. This forms the initial width of your bag’s bottom. Work a simple looping technique into the second link from your tool. Continue this across the entire row. This initial row lays the groundwork for the rest of the base. It ensures a flat and even starting point.
Building the Body with Simple Stitches
How do you build the main section of your bag with straightforward looping methods? After finishing the base, you will begin working in continuous rounds. This technique creates a seamless tubular shape. Utilize the fundamental looping method for several rows. This forms the central part of your carry-all. Always place a marker at the start of each round. This helps you keep track of your progress. Maintain consistent tension throughout. This ensures an even and attractive fabric texture for your finished item.

Creating Sturdy Straps for Your Tote
How do you create strong handles for your carry-all? First, determine the desired length for each handle. This will vary based on your preference. Next, form a series of loops for one handle. Skip an equal number of elements on the main body of the bag. This creates space for the handle attachment. Securely connect the loop series to form a complete handle. Repeat this process for the second handle. Work looping techniques around each handle loop. This reinforces them significantly. It also adds to their durability. Join them firmly to the main item. This ensures your carrying loops are robust and long-lasting.
Tips for Success: Making Your Crochet Tote Bag Even Easier
How can you make crafting your carry-all even simpler? Using the right tools and techniques can greatly enhance your experience. Opt for a slightly larger implement than suggested if you find your fabric too tight. This creates a more flexible and forgiving fabric. Always count your rows and loops frequently. This prevents mistakes and ensures symmetry. A small counter can be very helpful here. Furthermore, consider using a lighter-colored fiber for your first project. It makes seeing your loops much clearer. Don’t be afraid to undo your work if you make an error. This is a normal part of the learning process. Practice makes perfect when forming loops. Enjoy the journey of creating your unique item.

Customizing Your Beginner Crochet Tote Bag
How can you personalize your newly crafted carry-all? You can easily add unique touches to make your creation truly yours. Consider adding decorative elements. For instance, sew on some colorful buttons or beads. Alternatively, embroider a simple design onto the fabric. You might also incorporate different fiber colors for stripes or color blocks. This adds visual interest. Furthermore, experiment with various edge finishes. A picot or shell border can elevate the look. You could even line your tote with fabric for extra durability and a polished interior. These small modifications transform your beginner project.
Video Tutorial: Visual Guide to Your Easy Crochet Tote Bag
Does a visual walkthrough help you learn best? A comprehensive video guide can simplify the process of crafting your first carry-all. It offers real-time demonstrations of each technique. This ensures you understand every movement.
Following along visually can clarify written directions. It helps new crafters immensely. This guide breaks down each stage into manageable segments.
Step 1: Gathering Your Supplies:The video begins by showcasing all necessary items. This includes the fiber, implement, and any notions. It helps you prepare before starting.
Step 2: Mastering the Foundation:Learn how to create the initial loop series. This forms the base of your project. The visual demonstration makes this fundamental step clear.
Step 3: Building the Main Body:Follow along as the video guides you through forming the main fabric. It shows how to maintain consistent tension. This ensures an even texture.
Step 4: Crafting the Carrying Loops:Watch how to create and attach the handles securely. This section emphasizes reinforcement techniques. It ensures durability for your bag.
Step 5: Finishing Touches:The guide concludes with tips for weaving in loose ends. It also covers adding any desired embellishments. This gives your item a polished look.
FAQ About Easy Crochet Tote Bag Patterns for Beginners
What is the easiest crochet stitch for a tote bag?
The half double crochet is often recommended for a simple tote. It creates a dense fabric. This stitch offers a good balance of speed and stability for your project.
How much yarn do I need for a beginner crochet tote bag?
Most beginner tote designs require about 300-500 yards of fiber. This quantity can vary based on the desired size of your finished item. Always check the specific project guidelines for precise amounts.
Can a beginner crochet a tote bag?
Absolutely, beginners can successfully craft a tote. Many designs are specifically created for those new to the craft. They typically use fundamental techniques and straightforward shaping.
Where can I find a free crochet tote bag pattern for beginners?
Numerous craft blogs and websites offer complimentary designs. Ravelry is a popular online database with many free options. YouTube tutorials also provide visual guidance for new crafters.
What are the best types of yarn for a beginner crochet tote bag?
Cotton or cotton blends are excellent choices for a beginner tote. They are durable and easy to work with. These fibers also provide good structure for carrying items.


1 thought on “Easy Crochet Tote Bag Pattern for Beginners: Start Crocheting!”